
Started Guide (Employee)
Account Activation
Your staffing agency must first create an account for you.
MiQuado will then send you an email inviting you to set a password in order to initialize your account

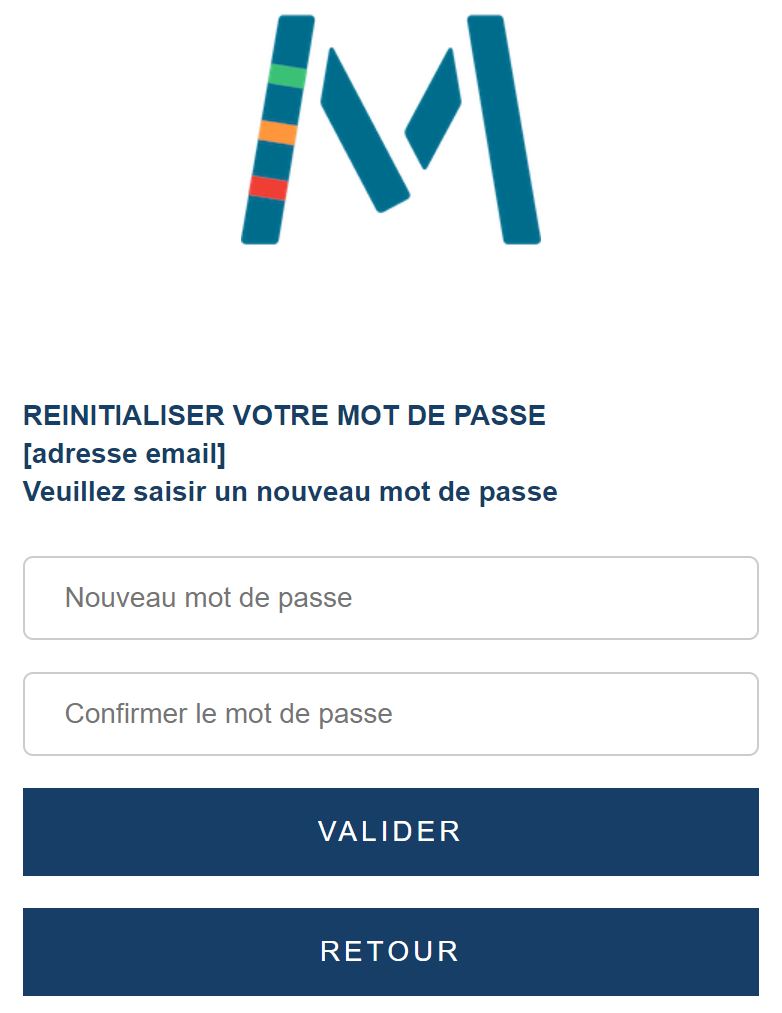
Click on the link : “Set a password and access MiQuado“.
On the reset page, enter your new password twice, meeting at least 3 of the following 4 criteria :
-
- 8 characters (mandatory),
- 1 number,
- 1 uppercase letter,
- 1 special character (e.g., @ & % £).
Once your password is set, you will receive a confirmation email.


LIVE Time recording

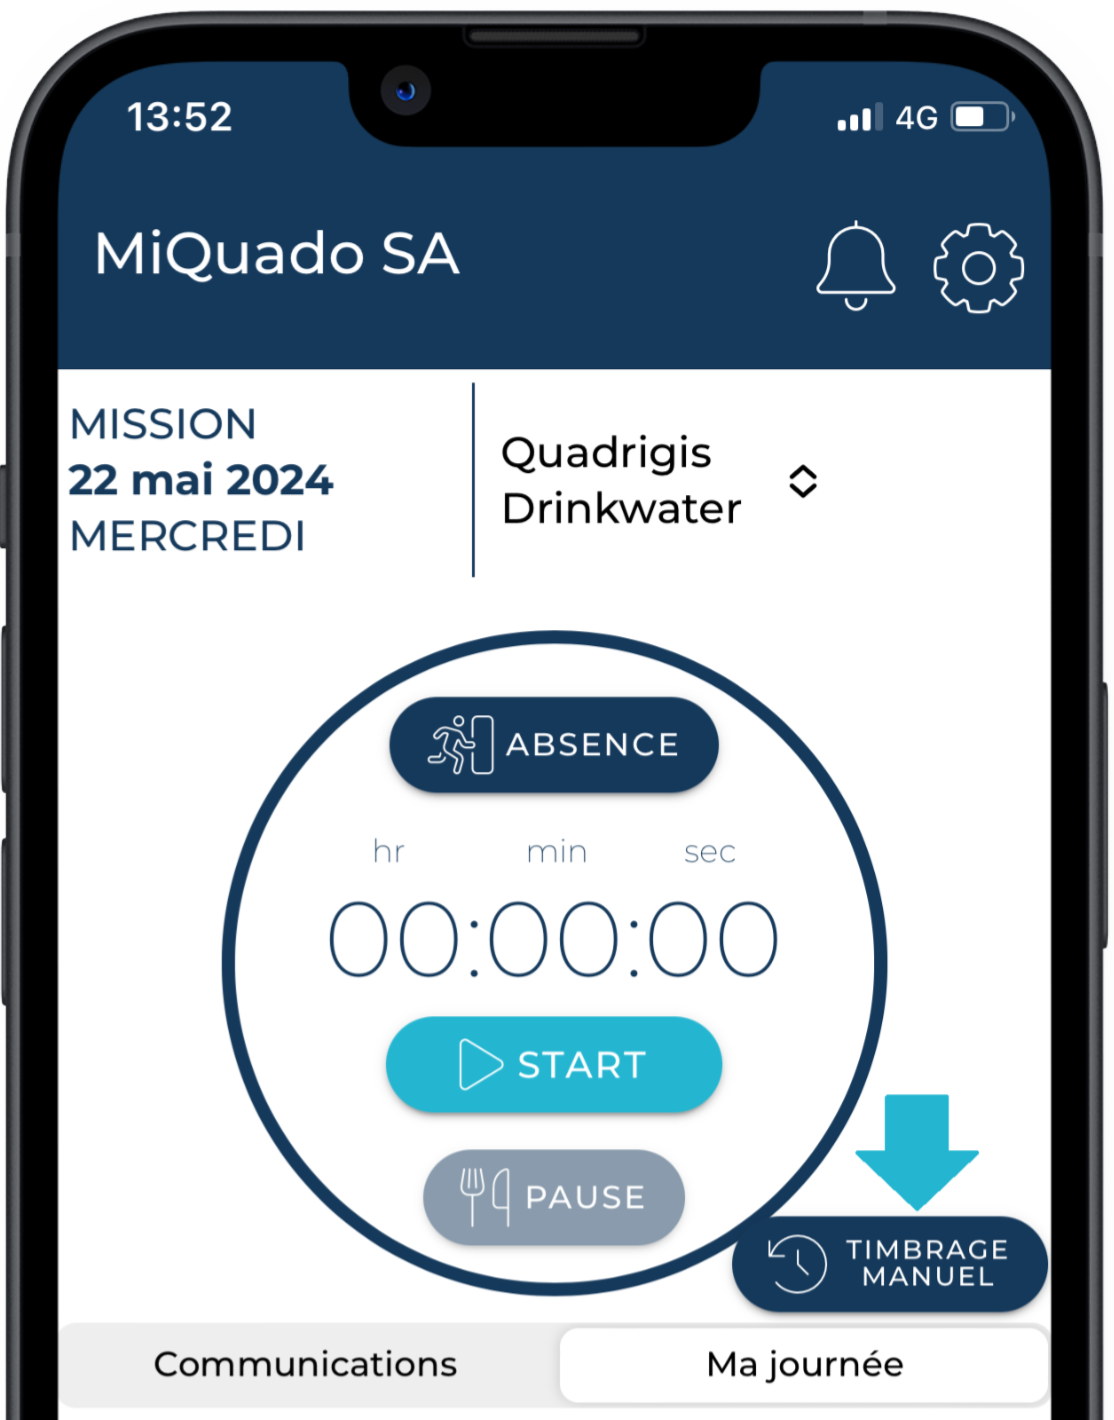
When you arrive at your workplace, it’s time to tell MiQuado that your workday is starting. Go to the Time Recording page, then press the START button. A popup will display your clock-in time. If this was a mistake, cancel it by clicking Cancel Start in the popup.
When taking a break (lunch, smoke, coffee), press the BREAK button. A popup will show the break start time. If incorrect, cancel it by clicking Cancel Break.
After your break, press START again to resume work.
At the end of the day, press the STOP button. A popup will confirm your clock-out time and wish you a good day. If it was a mistake, cancel it using Cancel End in the popup.
As you can see, it’s simple and quick.
However, MiQuado does enforce certain rules. If you press BREAK and forget to clock back in, the system will interpret that as the end of your day. A notification will inform you the next time you open the app. If you clock in and forget to stop after more than 14 hours, MiQuado will stop your clocking automatically. You will be notified and can correct this via MANUAL RECORDING.
Multiple missions
If you have several missions in one day, select the correct mission at the top of the Time recording page before starting your recording.
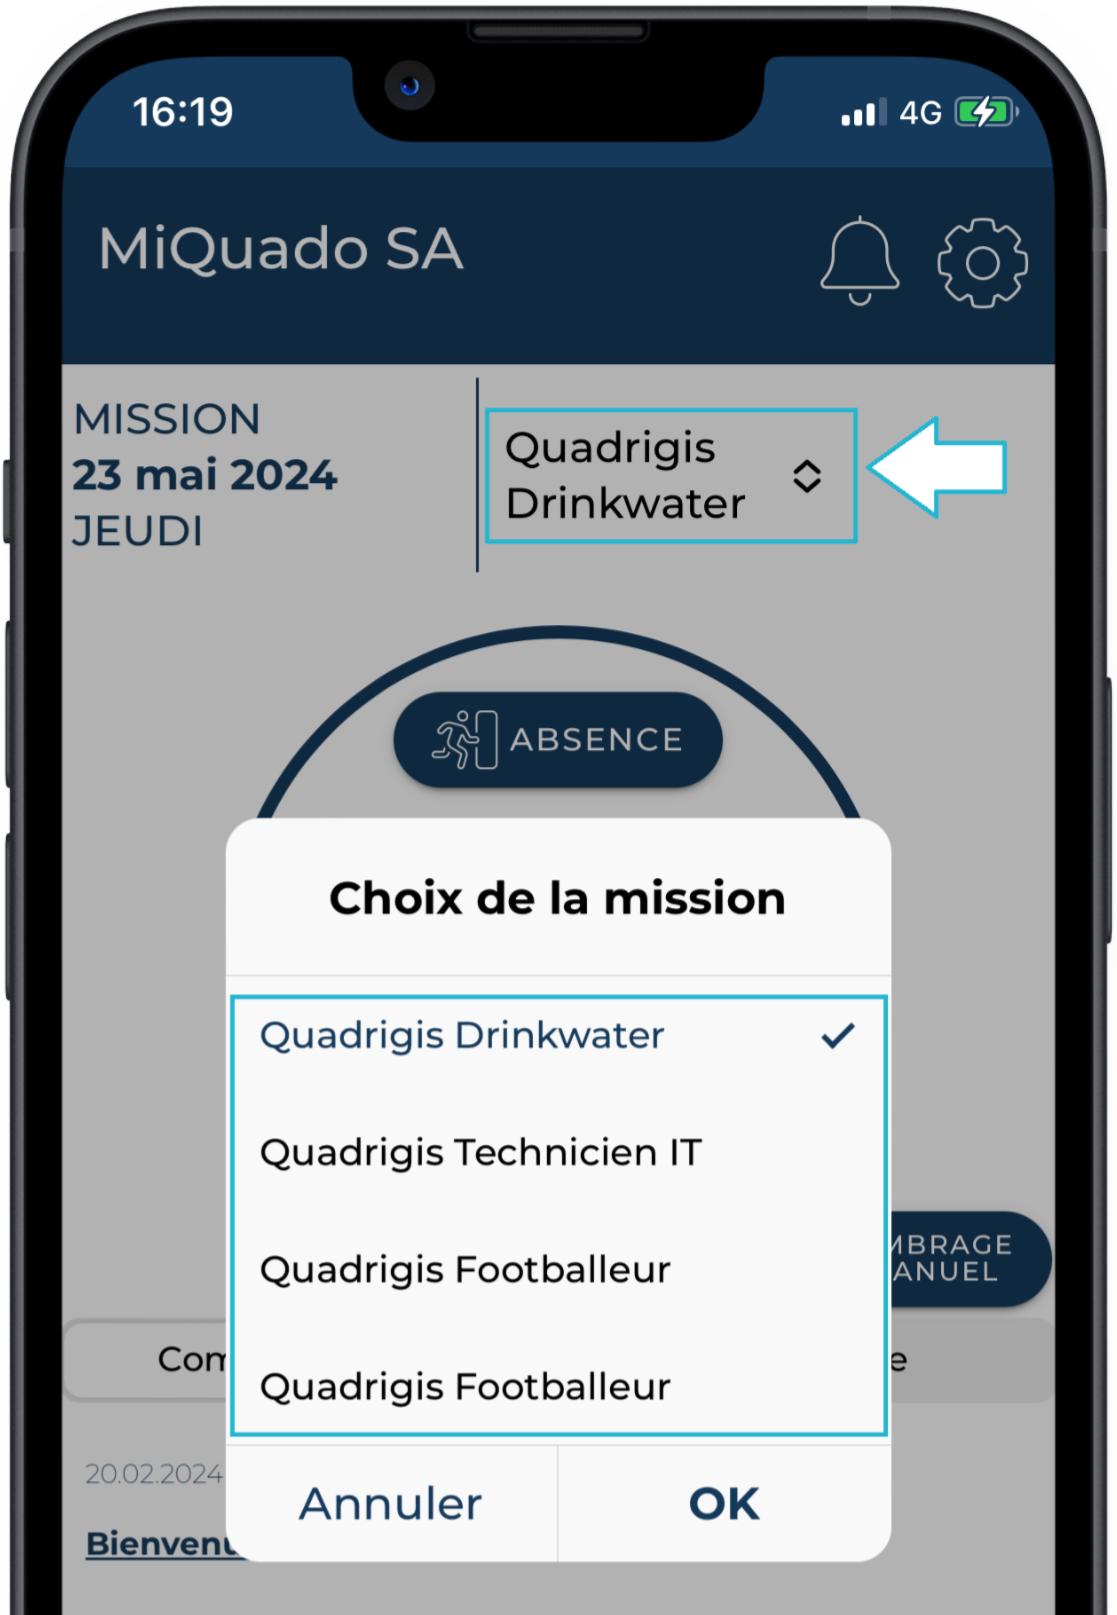
Once time tracking starts, you cannot change missions unless you stop your recording first.
Manual Time recording
If you’re already at work and forgot to clock in, you can enter your time record manually.
Current week
Steps on MiQuado :
- On the Time Recording page, press MANUAL RECORDING,
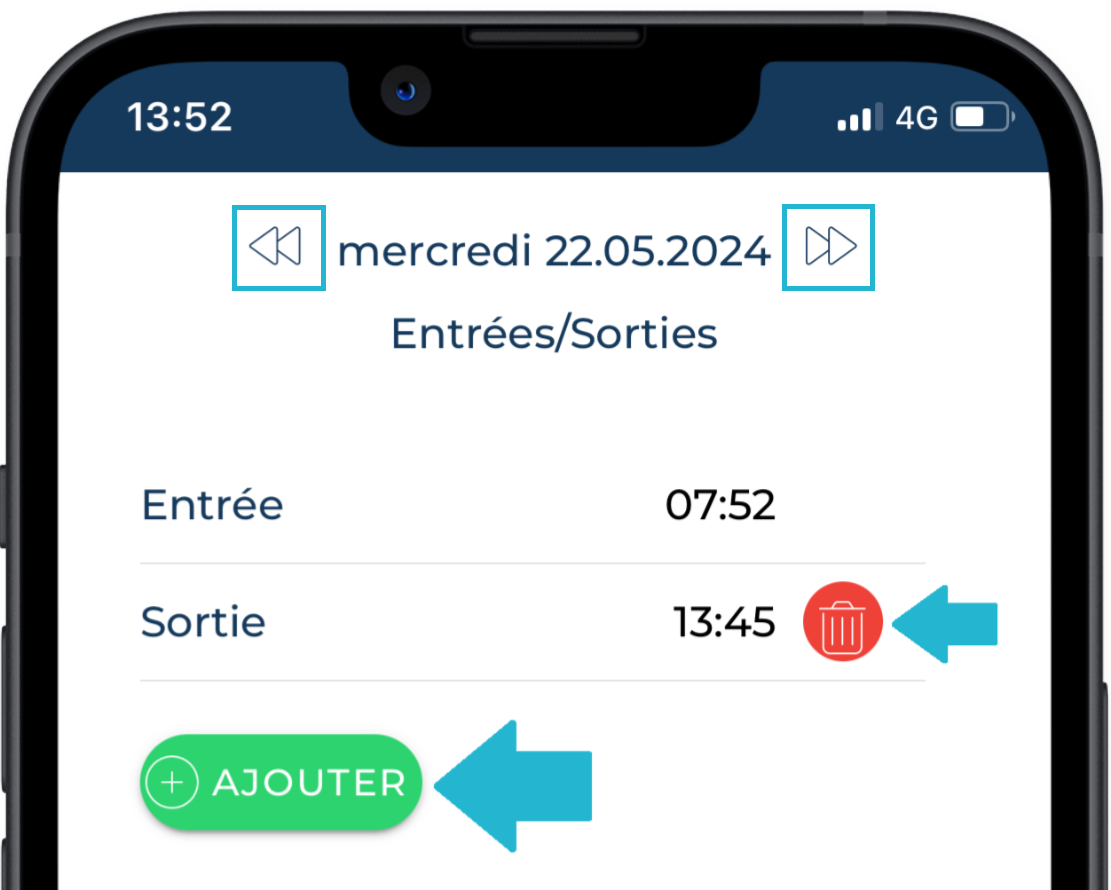
- Add your clockings according to your actual work times :
- Press ADD to add a start time,
- Tap the time to edit (default is current time), and select your actual start time,
- Press ADD again for the end time,
- Tap the default time (1 hour after start), and choose the correct end time,
- Use the TRASH icon to delete entries.
- Press OK to confirm.
- Press ADD to add a start time,
Entry order doesn’t matter — MiQuado automatically sorts clockings.
Use the Next/Previous Day buttons to adjust times for other days.
If you clock time in the future, all buttons will be greyed out until that time.
To unlock, delete the future clocking entry.
Past weeks
If you wish to change the stamping for previous weeks, follow these steps :
- Go to the Reports page and open the report for the week to modify,

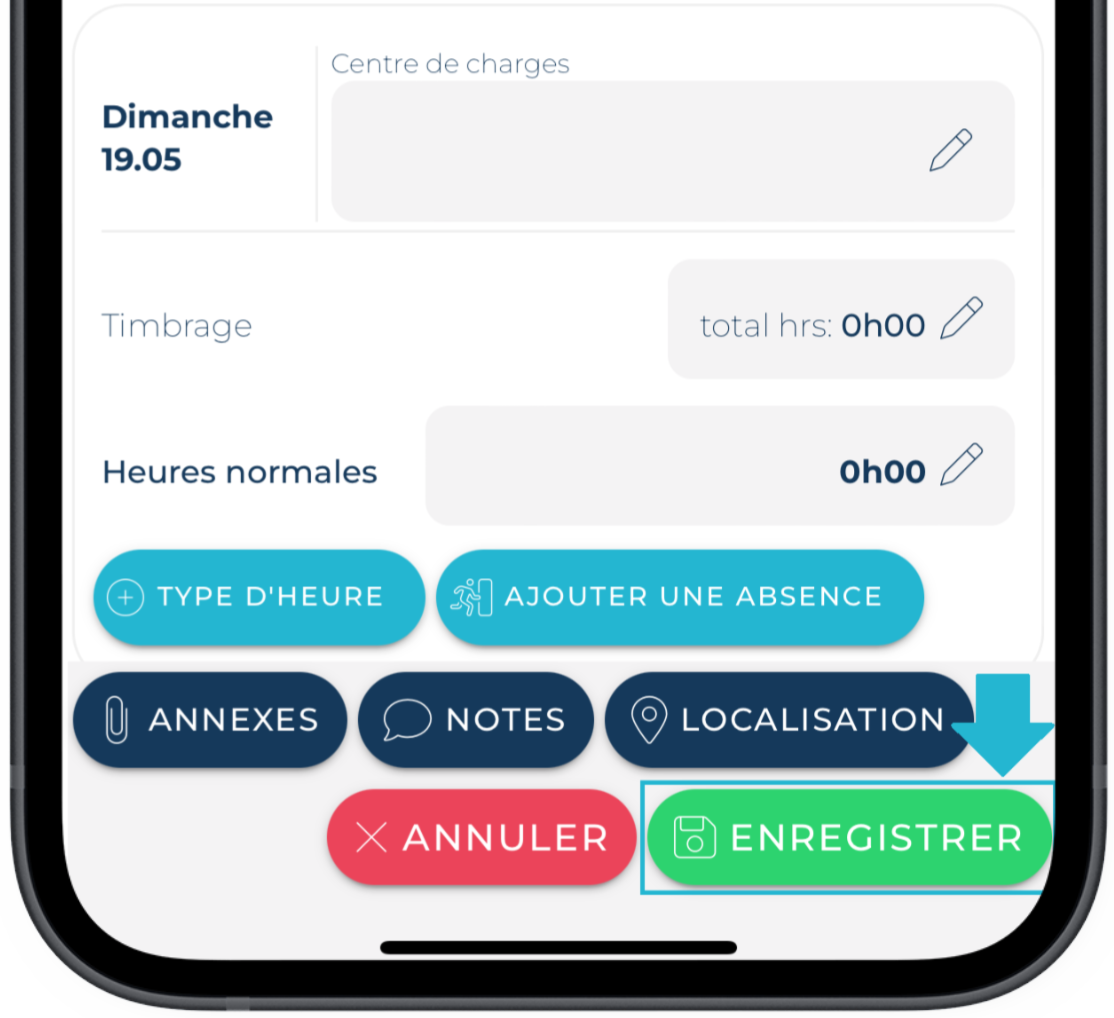
- On the desired day, click the PENCIL icon next to Time recording,
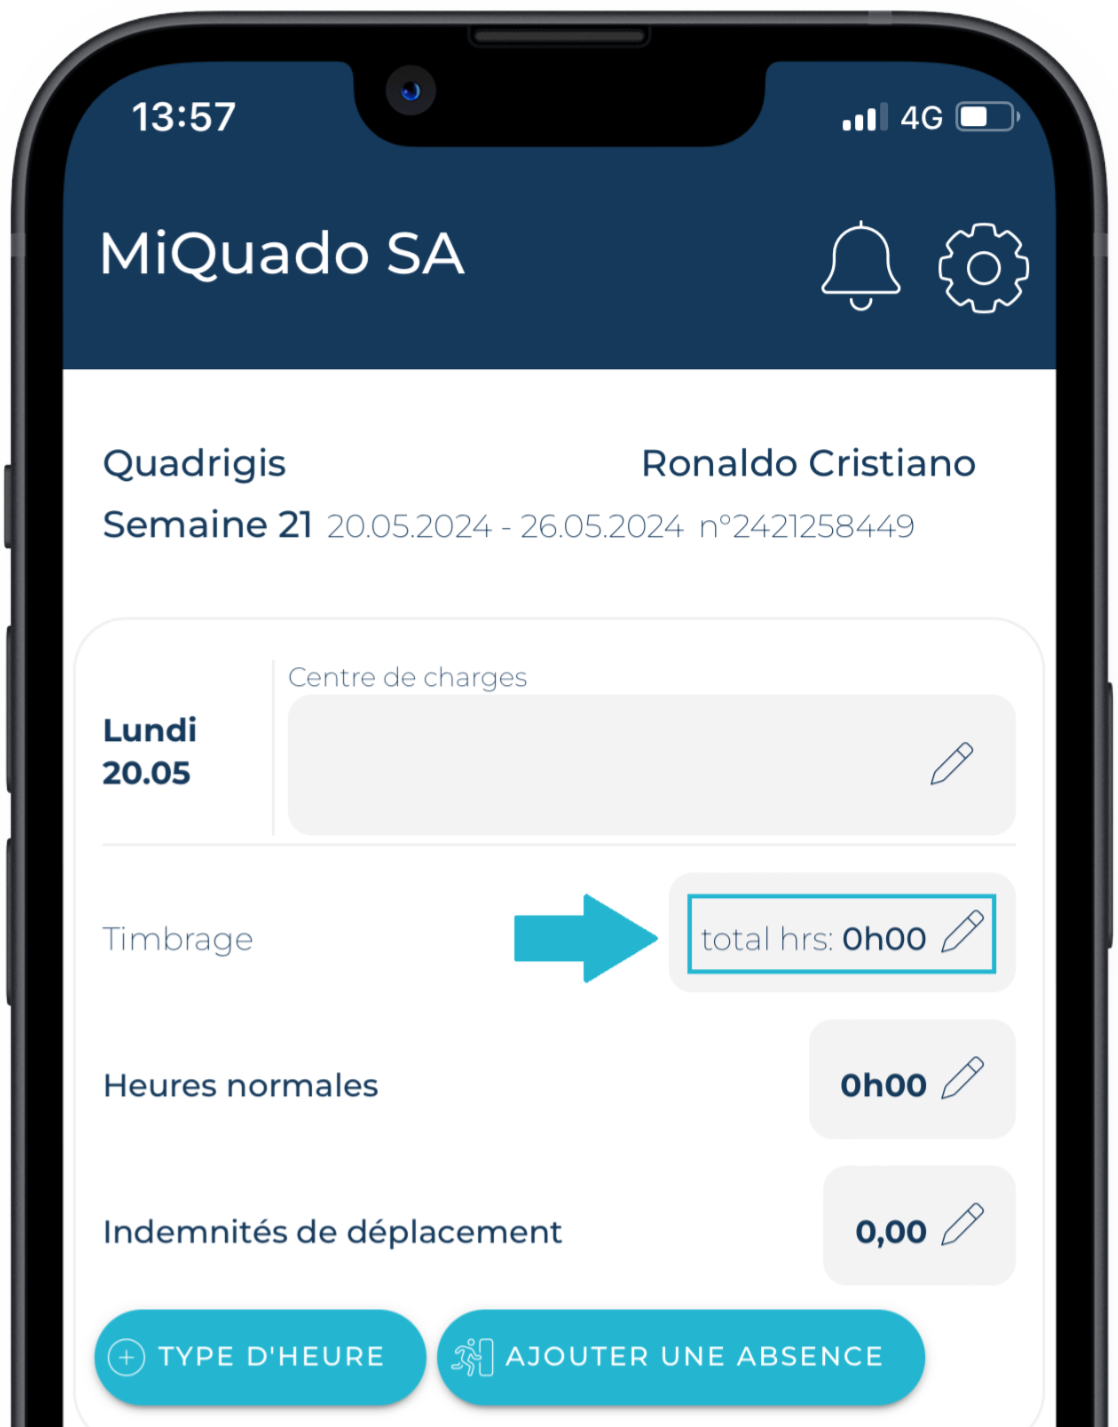
- Edit your entries as you would in manual recording (see previous paragraph),
- Time entries are automatically converted to normal hours,
- Press SAVE. A popup will confirm saving succeeded and inform you that you still need to validate the report. Saving ≠ Validation.
Report an Absence
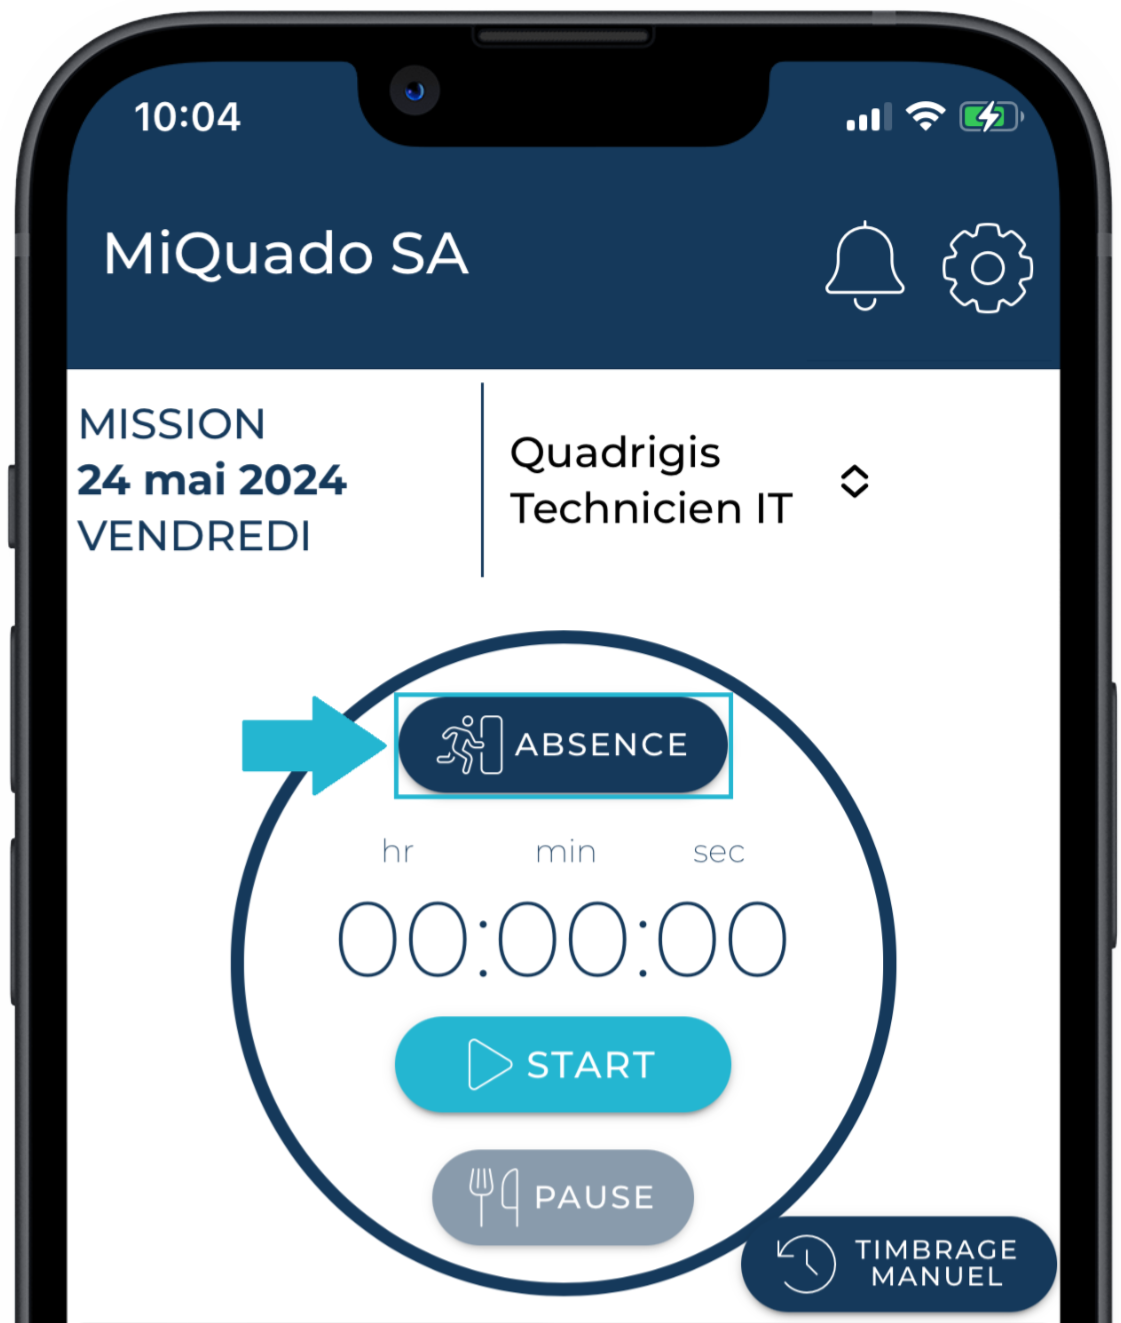
If you’re not going to your workplace today, use the Absence button on the ATime recording page. Select the reason for your absence and send the info to your agency and employer.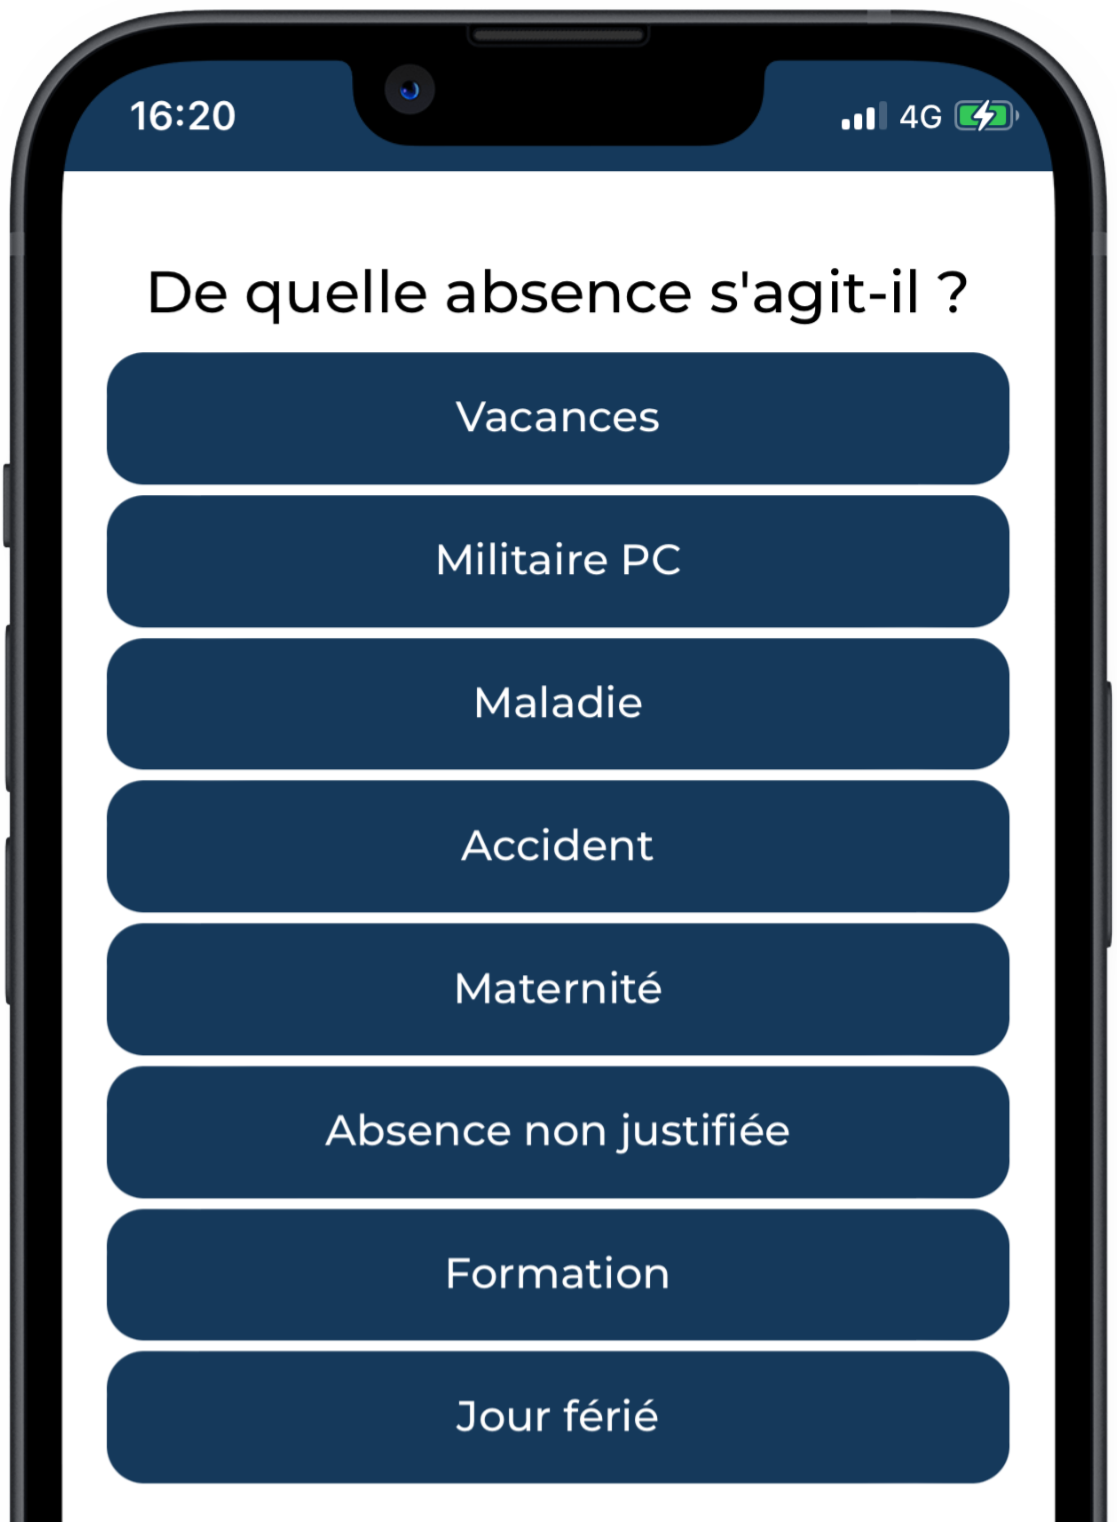
WARNING : This does not replace notifying them by phone unless otherwise agreed.
Delete an Absence
You cannot delete an absence via the Time recording page.
Go to the Reports, enter the week, and delete the absence using the MINUS button for the specific day (-).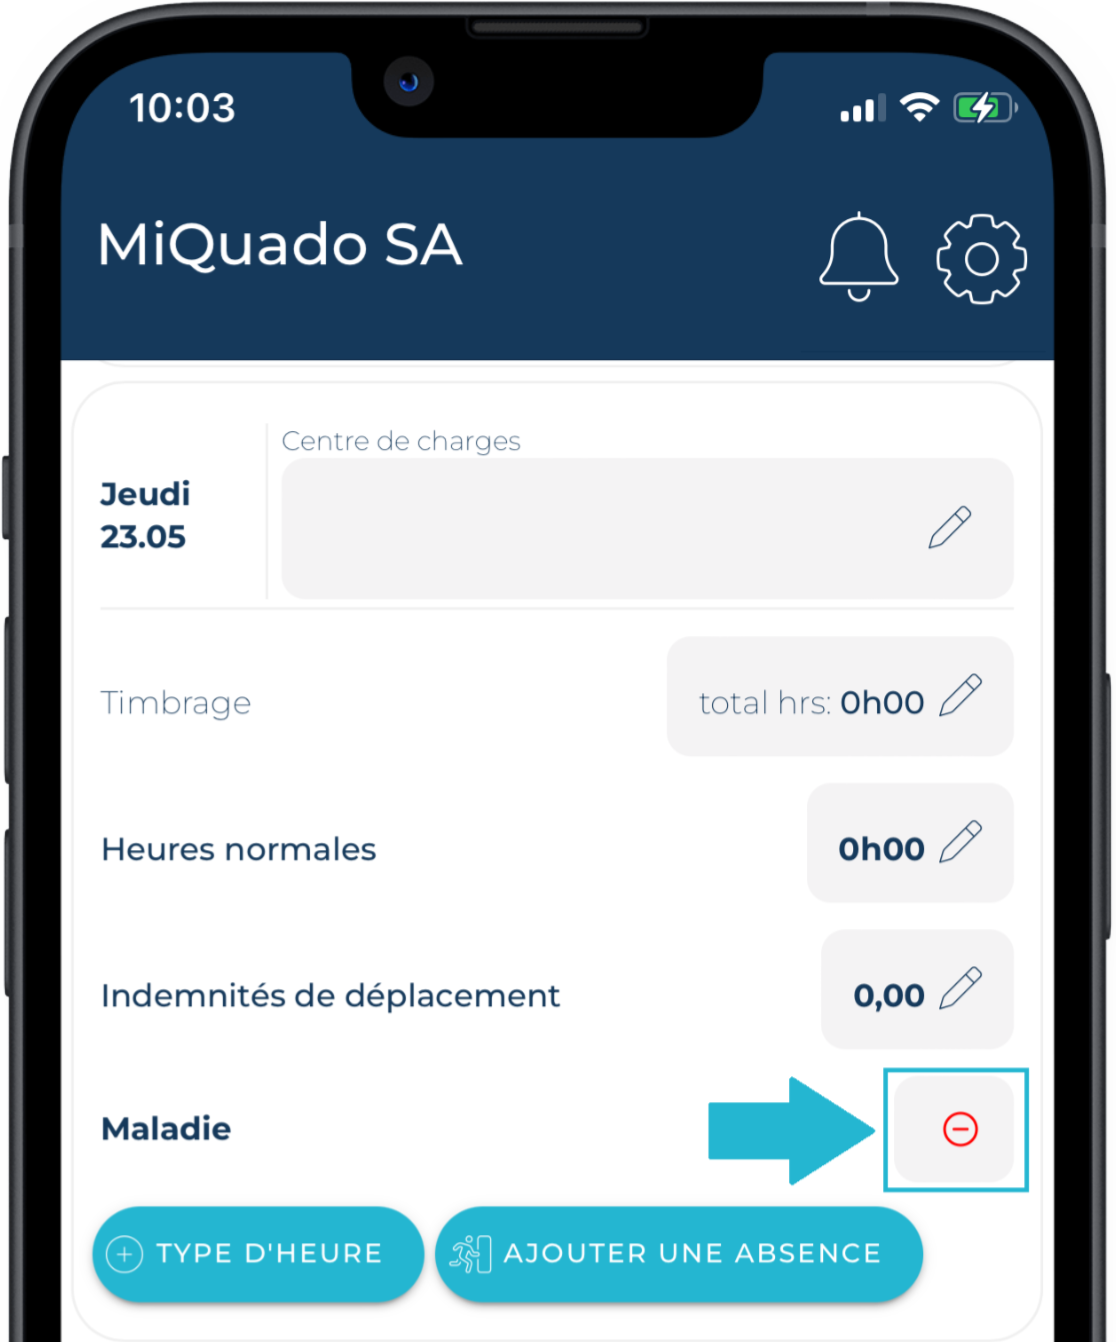
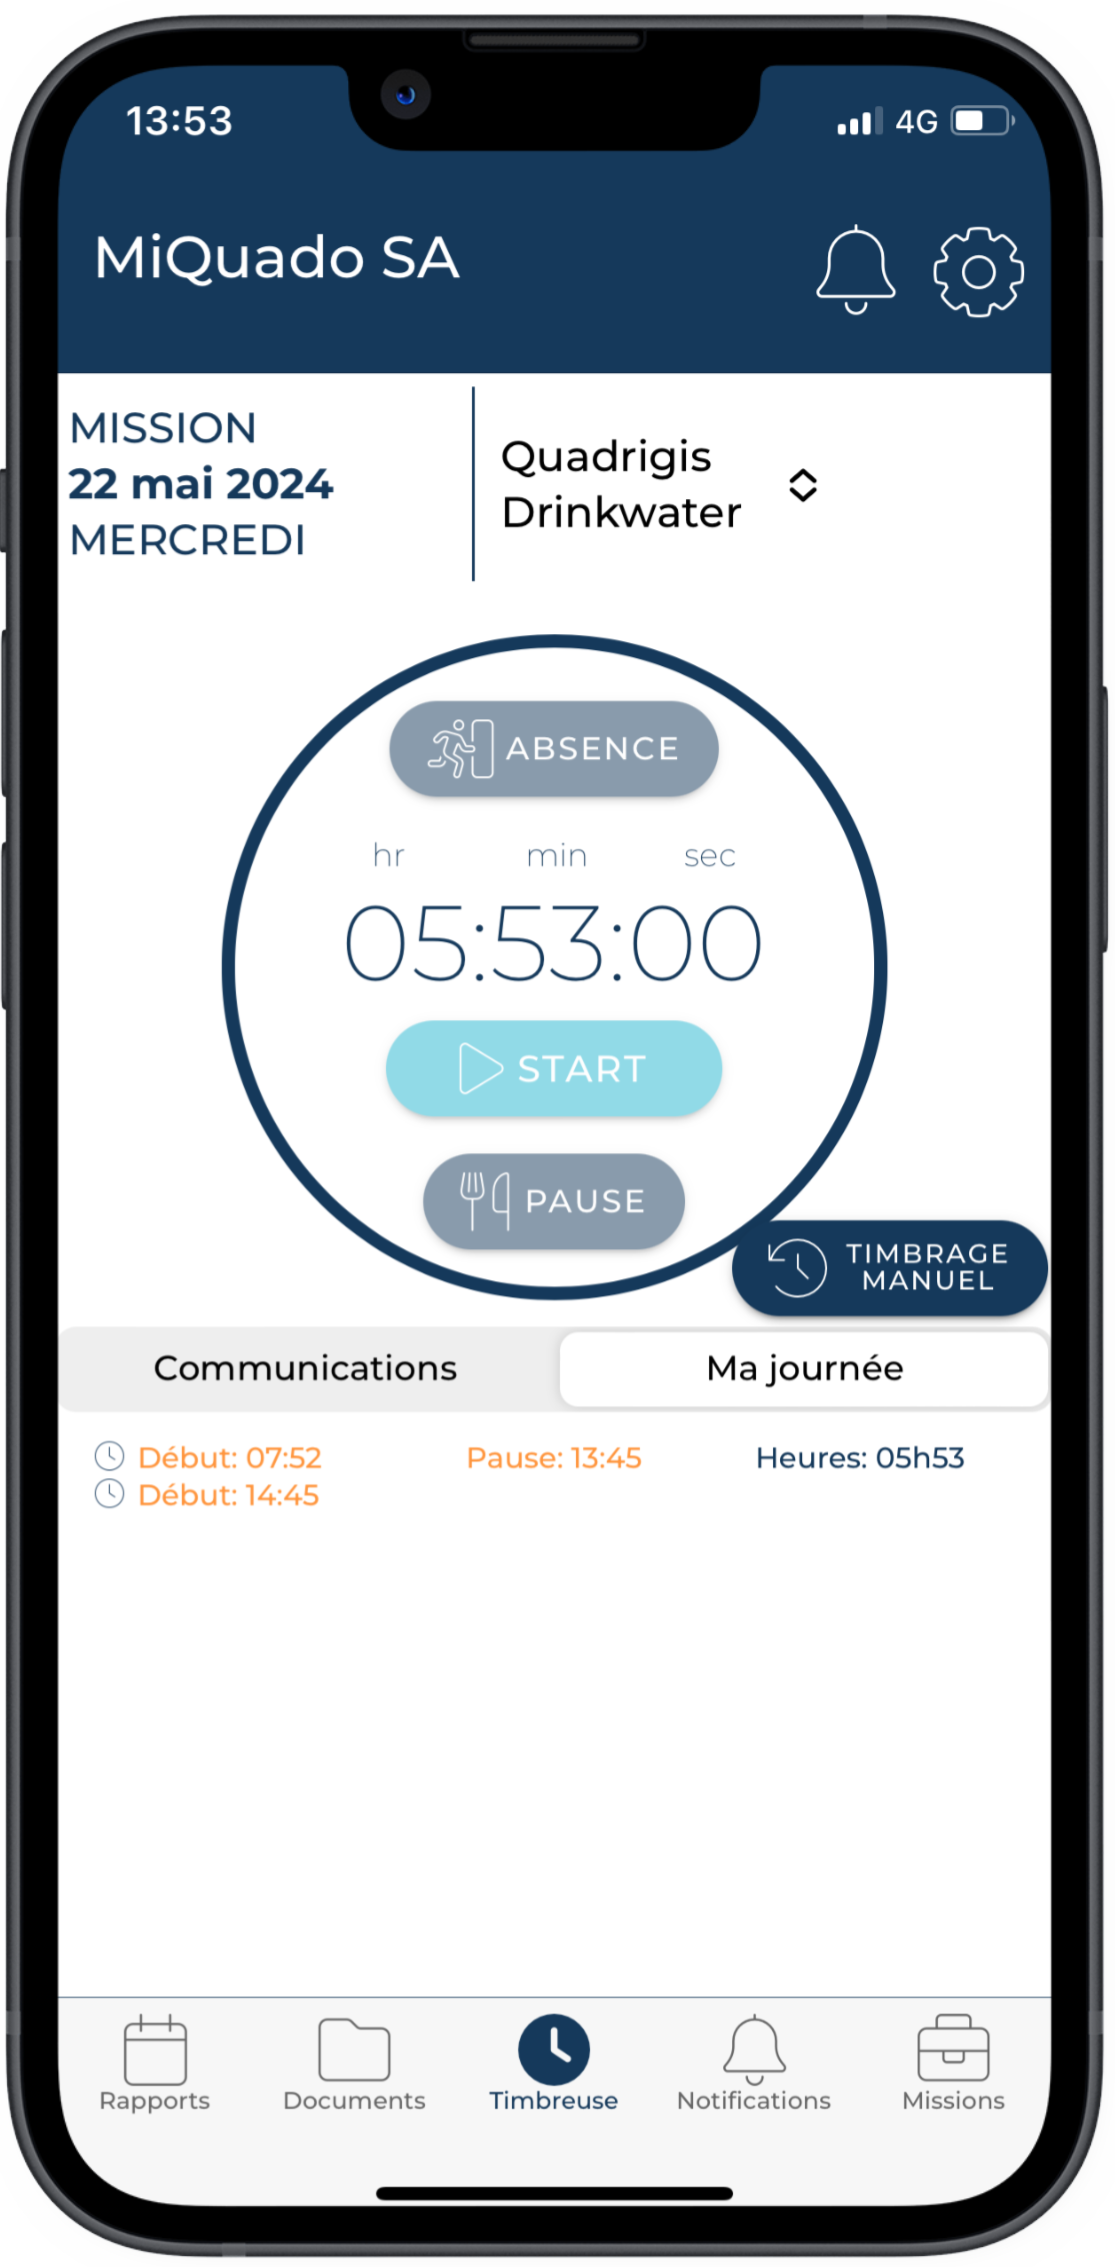
My day
The My day section lets you review all your recordings for today. LIVE recordings are shown in black. Manual clocking appear in orange.
For each STOP/BREAK, MiQuado displays the total hours worked.

Communications
The Communications section allows your agency to send you general info — such as:
-
Office opening hours
-
Scheduled closures
-
Welcome messages for new users

Reports
Validation of work reports
The workflow for validating a work report is divided into 6 steps and 4 colours.
| STEP | STATUS | COLOUR | DESCRIPTION |
| 1 | Employee editing | GREY | The report must be entered by the employee. |
| 2 | Employee validated | YELLOW | The report has been validated by the employee. But the employee can still modify it. |
| 3 | Company edition | YELLOW | The report has been modified by the company. The employee can no longer modify it. |
| 4 | Company validated | ORANGE | The report has been validated by the company. But the employee can still modify it. |
| 5 | Agency editing | ORANGE | The report has been modified by the agency. The company can no longer modify it. |
| 6 | Validated by all | GREEN | The report has been validated by the agency. And therefore by everyone. |
Employee editing > Employee validated
Ideally, you have regularly time recording your days using LIVE or MANUAL RECORDING. At the end of the week (or the end of the month), you’ll need to validate your working time by starting the validation workflow. To do this, go to the Reports page, under the Reports in progress filter. This is where you will find all the weekly reports for which you are responsible.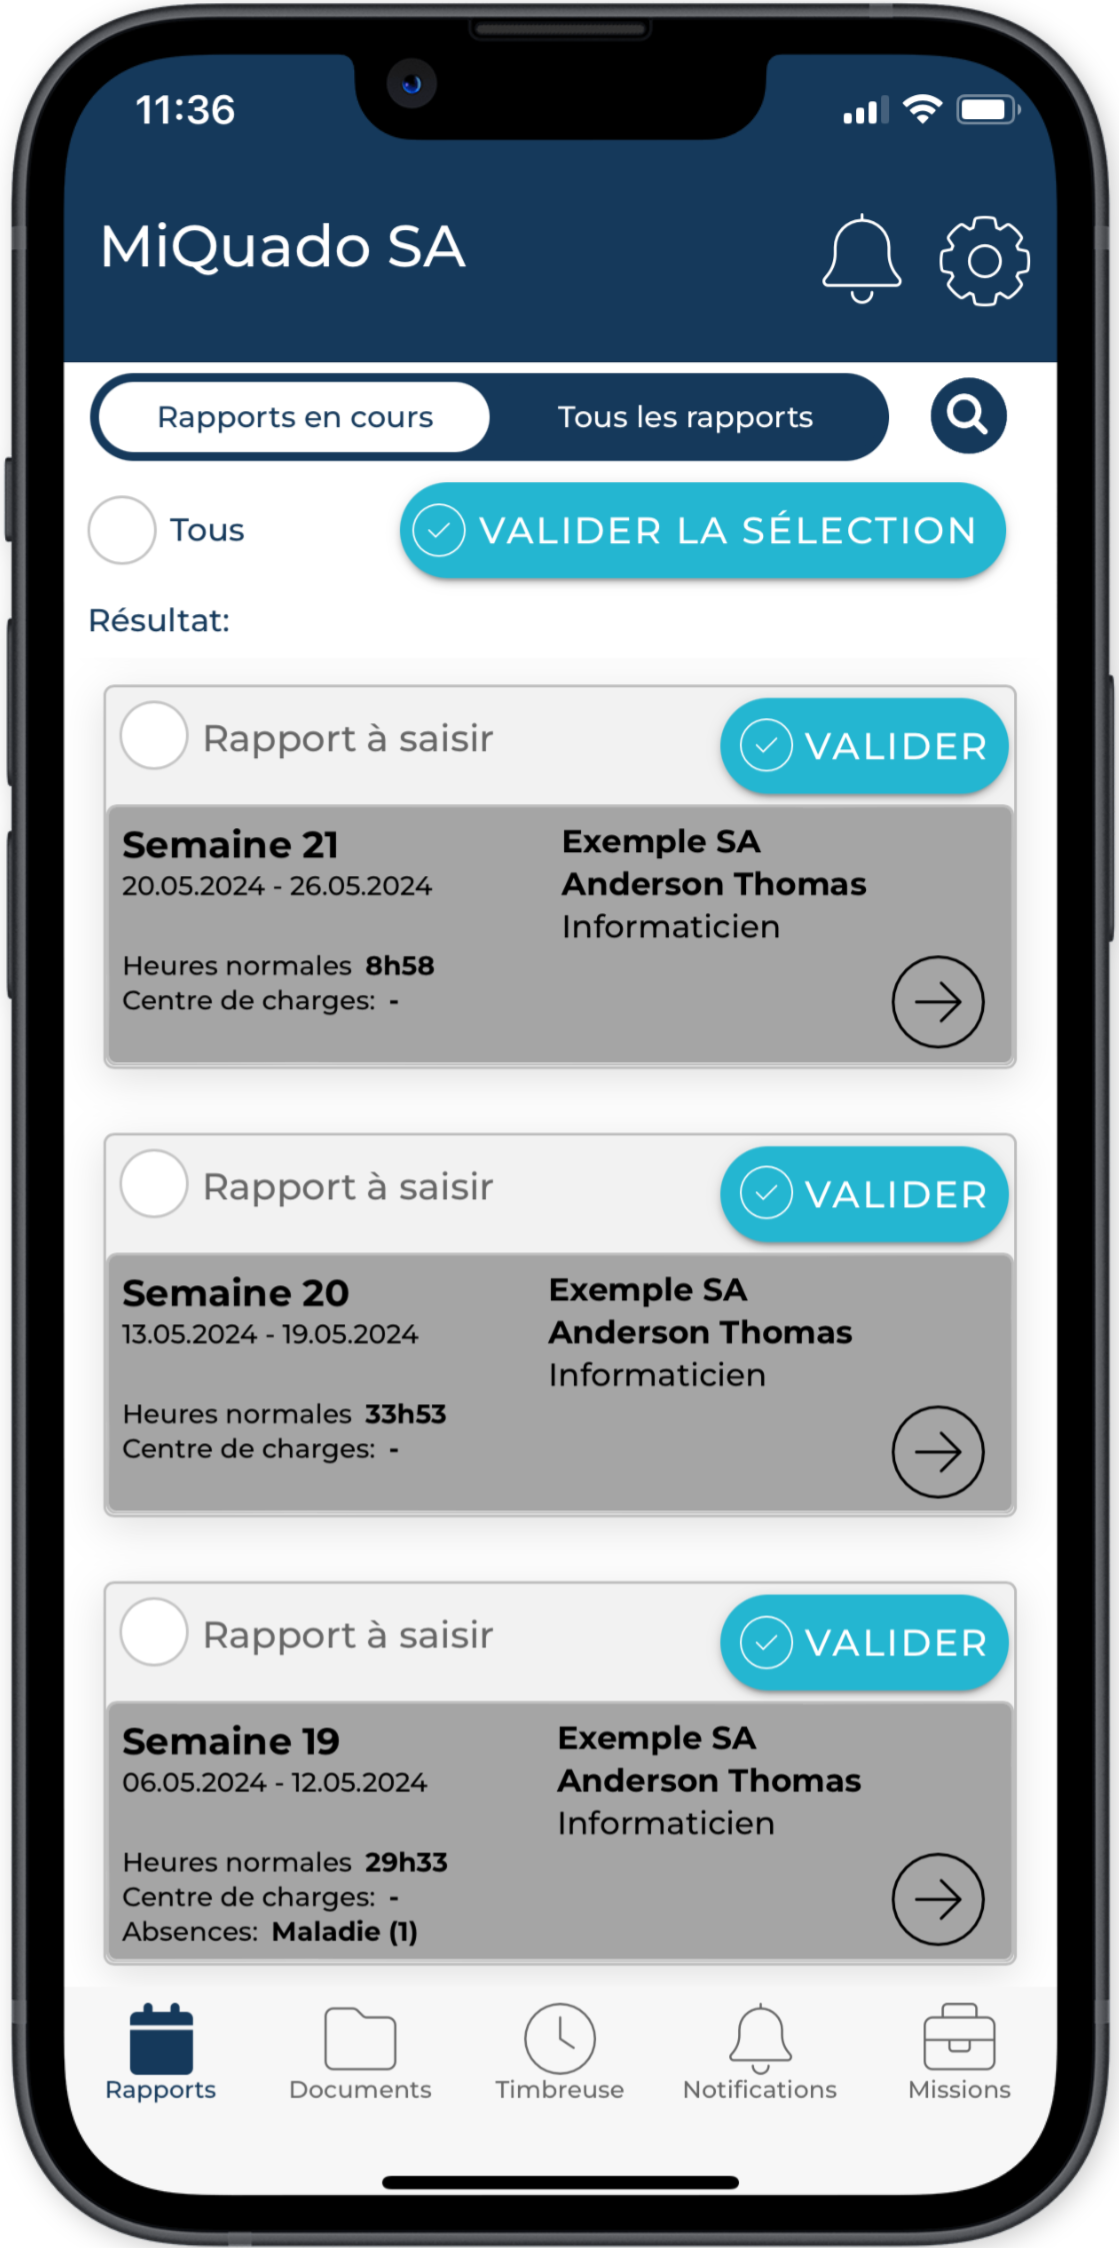
All the data in the report is summarized, including your total timetable converted to normal hours and any absences already announced. If everything seems correct, validate your week by clicking on the VALIDATE button, and confirming that you have completed the entire week. The colour of the report will then change to yellow.
If you want to validate several weeks at once, select the weeks concerned and click on the CONFIRM SELECTION button.
Employee validated > Company editing > Company validated
Once the employee has validated the report, the next step is for the company to validate it (Reports >Reports in progress). The reports are then yellow, and if the company has no changes to make and all appear to be correct, the report status can be changed from Employee validated to Company validated by using the VALIDATE button, as in the previous phase. The colour of the report then changes to orange.

If the company makes changes to the report and uses the SAVE button on the detailed report page, the status changes to Company editing and the report can no longer be edited by the employee. However, the colour of the report remains yellow.
It is always possible to validate several weeks at once, by selecting the weeks concerned and clicking on the CONFIRM SELECTION button.
Company validated > Agency editing > Validated by all
All that remains is to wait for the agency to validate the report before completing the processing flow.
If the agency modifies the report without validating it, the status changes to In agency editing, and the company can no longer modify the report. But the colour of the report remains orange.
And if the agency validates the report, then the status changes to Validated by all, and the colour of the report changes to green.